How to Verify That Your iPhone is SIM Unlocked
 I detail how to travel with your iPhone and avoid excessive charges from your wireless company in my book, The Cheapskate’s Guide to Traveling With Your iPhone. If you have read my previous article, “Adventures in SIM Unlocking an AT&T iPhone,” you know that I had quite a time getting my family’s iPhones SIM unlocked in time to travel to Costa Rica. I needed to do this so we could use foreign cellular service while traveling in Costa Rica in order to not get nailed by our wireless carrier’s exorbitant international roaming fees or paying their only slightly less exorbitant international package rates. Anyway, the good news is that I was able to successfully unlock all our iPhones, both with and without AT&T’s cooperation. However, before we traveled, I wanted to be 100% sure that my family’s iPhones were in fact unlocked and properly functioning on another carrier’s network. This turned out to be an adventure of its own!
The web is filled with instructions on how to activate your newly unlocked iPhone to verify its unlocked status. Unfortunately, most methods say that you must backup your iPhone using iTunes on a computer and then restore it to get the unlocking activated. That process, frankly, is a pain. As it turns out, most of the information on that process is mostly outdated anyway. Fortunately Apple states in a support article that all you need to do is insert the SIM card of another wireless carrier in your iPhone to activate the unlocked status. However, this method is not well-documented. Apple’s instructions only shows two steps! I found virtually no corroborating documentation elsewhere. So as I was doing my own testing, I took careful notes of the process so I could detail it here. I also created a video of the process, which you will find at the end of this article.
Activating Your Unlocked iPhone in More Than Two Simple Steps
As Apple’s article states, to activate an unlocked iPhone you simply need to swap out the SIM card in your iPhone with the SIM card of another wireless carrier and then complete the setup process. Sounds simple enough, but there are many details in that process that I think people should be aware of.
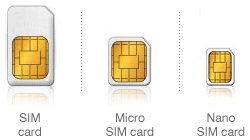
The different sizes of SIM cards. Make sure you know which size your iPhone uses.
The first thing to understand is there are different sizes of SIM cards. Most likely, if you have a recent iPhone (iPhone 5 and newer) you will need a “nano-SIM,” which is the smallest SIM currently available. If you have an iPhone 4 or iPhone 4S, then you will need a “micro-SIM,” which is slightly bigger than a nano-SIM. Older iPhones use the largest common size, simply called a SIM card. There are adapters that can make smaller SIM cards fit larger slots if needed. Be sure you know what kind of SIM you need so you can match it up correctly.
Beyond understanding what a SIM card is, the first question most people will have is how exactly do you get your hands on the SIM card of another wireless carrier? Your first option is borrowing the SIM card from someone who has a different wireless company. For the purposes of verifying or activating an unlocked iPhone, this should not affect the SIM card or your friend’s service. The process should only take a couple of minutes (per phone) so they should barely miss it. Offer your friend a Margarita or something for their trouble. Your friend does not need to have an iPhone, only a phone with the same size (or smaller if you have an adapter) SIM card.
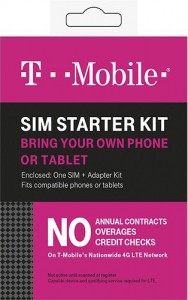
This was the T-Mobile pre-paid SIM I purchased. Obviously the packaging may change in the future.
If borrowing the SIM card from a friend is not a simple option (or if you’re like me and you want to have a SIM card around for your own uses), you can purchase a SIM card. If you go to an electronics store like Best Buy, you will find a multitude of SIM cards from various companies offering pre-paid wireless service. You just need to make sure you are purchasing a SIM card from a carrier different than the one you currently use. Since my carrier is AT&T, I purchased a pre-paid SIM from T-Mobile, since I knew for certain that T-Mobile was a completely different carrier. Many of the pre-paid cellular companies actually use the network of one or more of the major carriers: AT&T, Verizon, Sprint, or T-Mobile. Companies that use the network of other carriers are known as Mobile Virtual Network Operators or MVNOs. In theory, even an MVNO SIM should work to activate an unlocked iPhone, since it is technically from a different service provider. However, I wanted to be 100% sure that my iPhones were unlocked and working on another carrier’s network, so I went ahead with the T-Mobile option.
When you purchase a pre-paid SIM, try to find the cheapest option available. You can buy pre-paid SIM cards with or without various service packages already included in the price. You do not need a service package to verify that your iPhone is unlocked, so don’t waste your money on the more expensive SIM cards. The T-Mobile pre-paid SIM I purchased had no service plan included and is normally priced at $15. That is a cheap enough price in itself, but the knowledgable person I was talking to at Best Buy took $5 off the price for me so I ended up paying only $10. Looking around later, the same SIM card went on sale for $5, so I would expect that you should be able to find a SIM card for around the same price if you shop around a little bit.
Again, make sure you are buying a SIM card that will fit your iPhone, which for most of us will likely be the smallest nano-SIM variety. With adapters, it is easy to upsize a SIM card to fit in a larger slot and many pre-paid SIMs come with adapters. It is also possible to cut down a larger SIM card to fit a smaller slot, but unless you have a special cutting tool, I don’t think it is worth the effort. Realistically, you should not have trouble finding the right size SIM for your iPhone. If you do, you probably are not shopping in the right place!
Be Prepared
Once you have a correctly-sized SIM card from another wireless carrier, you are almost ready to begin. There are a few things you will need to have prepared to complete the process. The first is to make sure your iPhone is connected to Wi-Fi, as the iPhone must communicate with Apple to complete the activation process. Once you pull out your current SIM card, your iPhone will not have Internet access over the cellular network, so it must have Wi-Fi access. Technically, you will get the option to connect to Wi-Fi during the activation process, but it is easier if it is already connected to a Wi-Fi network. This is one of the main reasons I recommend testing your unlocked status before you travel to a foreign country. You may or may not have Wi-Fi when you are purchasing a SIM card where you are traveling, so you might as well do it well ahead of time at home where you know you have Wi-Fi.
Second, make sure you know which Apple ID is linked to the iPhone and the password for that Apple ID. If you are not sure of the Apple ID, go into the Settings App in your iPhone then scroll down and tap on iCloud to verify the account information. If you are not sure of the password, tap on the account name and you will be asked to enter your pass word. Verify the password and if you can not remember the password, you will have the option to reset it. Make sure you know your Apple ID and password before moving forward.
Finally, you will also need a SIM extraction tool or a straightened out paper clip in order to eject the SIM card from your iPhone. SIM extraction tools used to come in the boxes of iPhones, so you may actually have one if you can find your old box. However, I believe they are no longer included with newer iPhones, so a straightened out paper clip works just as well. If you really want, you can also buy SIM extraction tools very inexpensively from places like Amazon. Either way, just have some way of ejecting your SIM card handy before beginning or you will not be able to proceed.
SIM Swapping 101
It is best to do this process over the middle of a clutter-free table. The SIM card and SIM card holder are tiny and it is easy to drop these things and lose them! If you do drop them, at least if you are over a table they won’t bounce around on the floor.
If you have a case on your iPhone you will need to remove it. Find the SIM slot on your iPhone and use the extraction tool or paper clip to eject the SIM card holder. The holder should only eject a little bit, just enough so that you can pull the holder out the rest of the way with your fingers. Your iPhone will state that there is “No SIM Card Installed.” Obviously, that should be expected and you can ignore that message for the time being.
Carefully remove the SIM card holder from the iPhone, noting the placement and orientation of the SIM card in the holder. Pop out your old SIM card from the holder and carefully put it aside. Insert the new SIM card into the holder correctly aligning it as the previous SIM card was (it should only fit one way, but again, these things are tiny and at first it can be a little confusing). Insert the SIM card holder back into your iPhone.
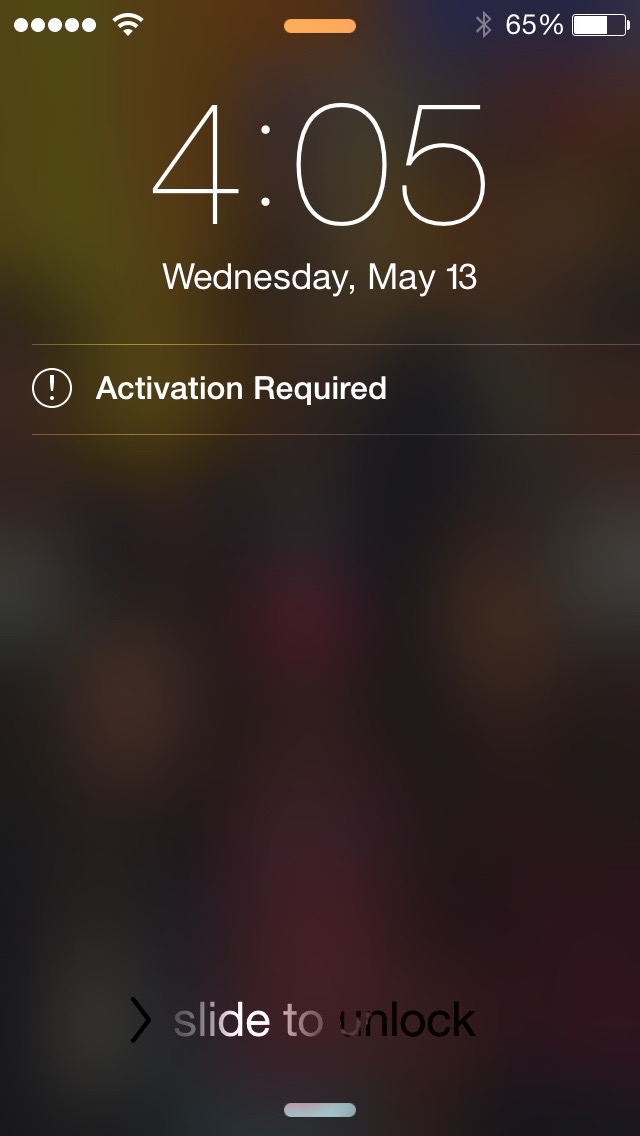
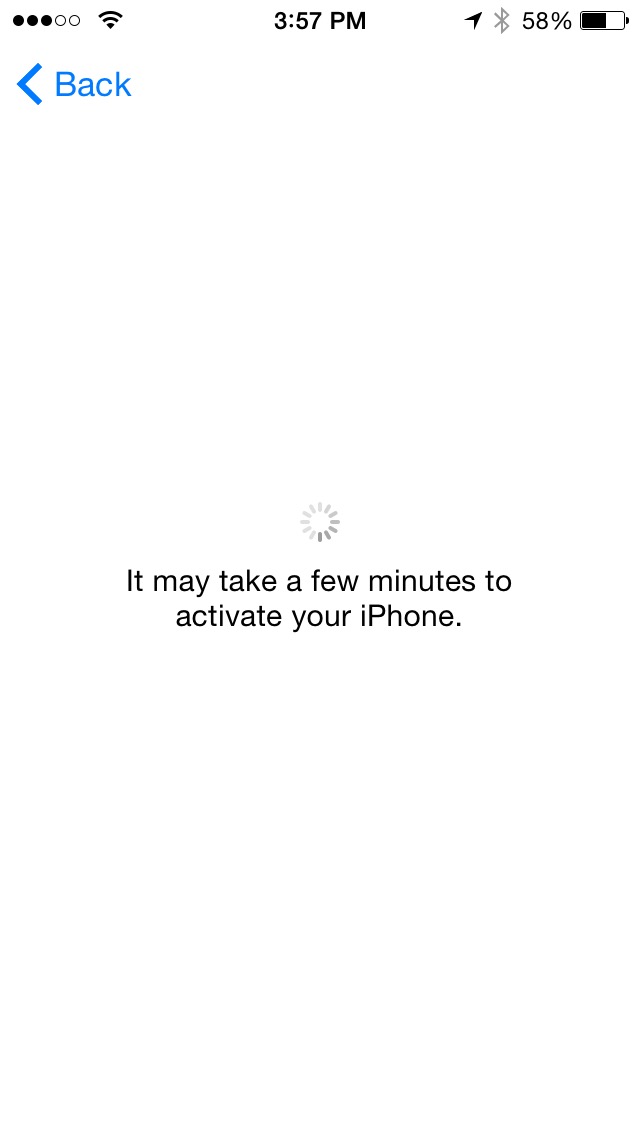
After a few seconds you may or may not notice that the iPhone does a soft reset indicated by the white Apple logo showing up on your screen. If you do not see anything on your screen after several seconds, you can try pushing the home or power button to wake up your iPhone. Whatever the process (and this may change slightly depending on iOS updates) you should eventually see “Activation Required”. Slide the message away to enter into your iPhone main interface and you may see (again depending on iOS version or particular process of your iPhone) either an “Update Completed” screen, a “Choose a Wi-Fi Network” screen (even if you are already connected to Wi-Fi), a screen that says “It may take a few minutes to activate your iPhone,” or an “Activate iPhone” screen. Below are some screenshots to help you along.
-

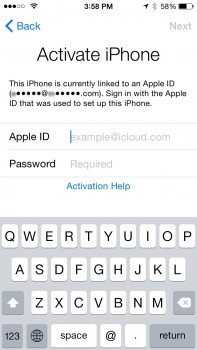
- If your iPhone is unlocked, this is what you will see when you insert the SIM of another carrier.
-

- You may or may not see this screen. You may also see “Choose a Wi-Fi Network” or one of the following screens.

-
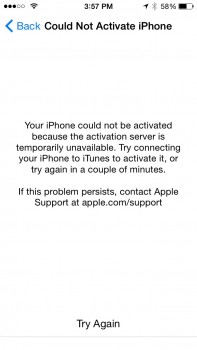
- If you see this screen, don’t panic. Just wait a few seconds and tap “Try Again”

-

- You may or may not see this screen. It might flash by quickly or not at all before going to the next screen.
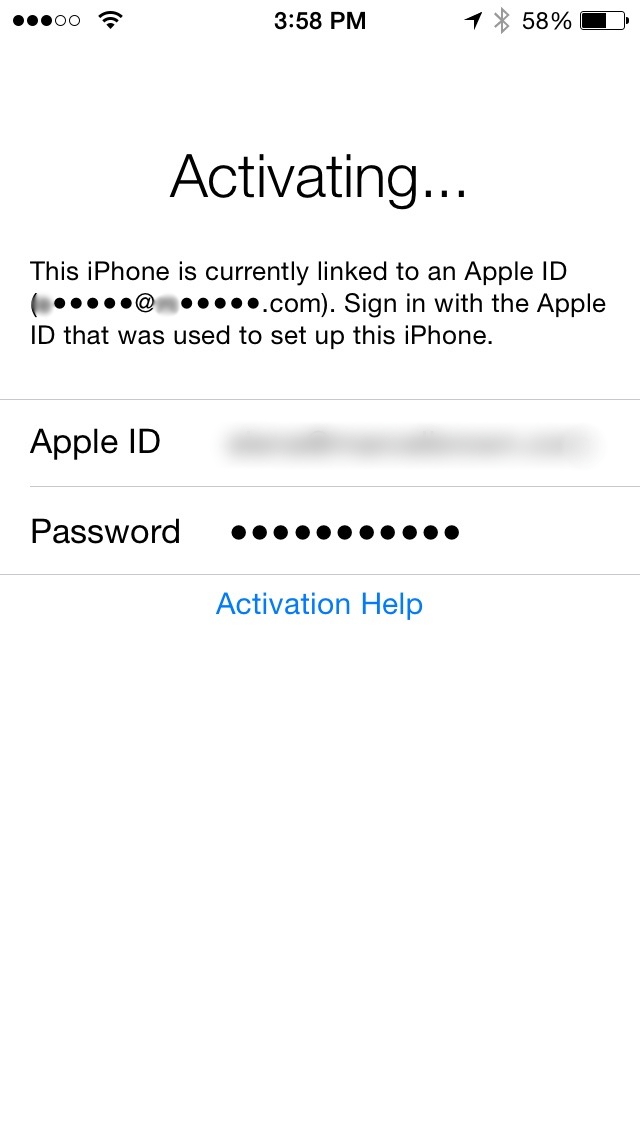
-
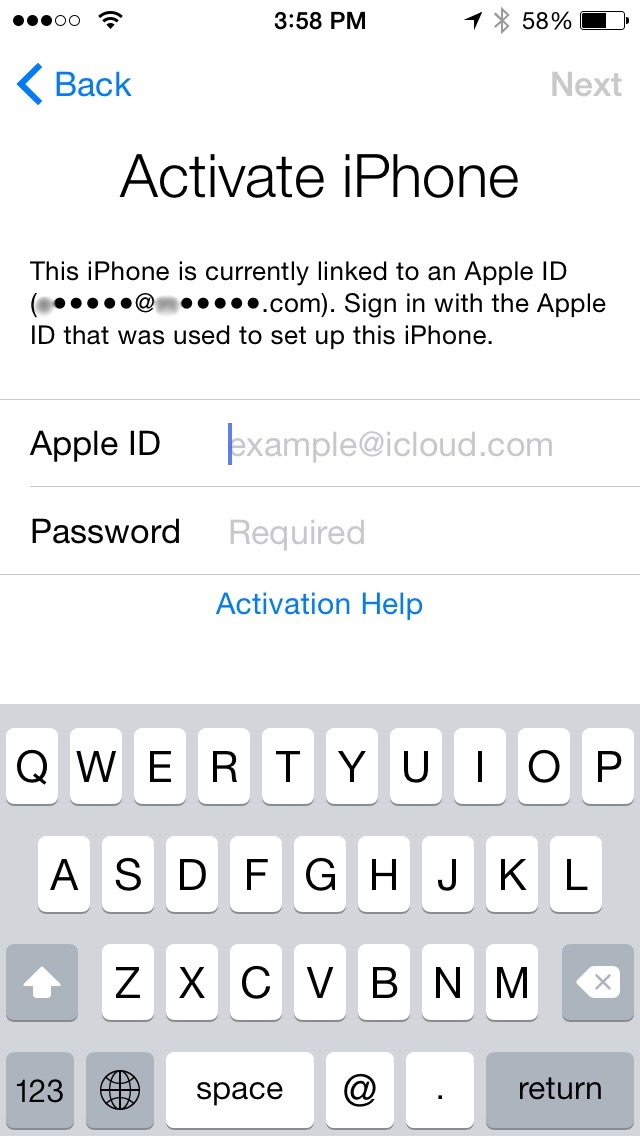
- Enter the correct Apple ID and password. You did verify these already, right?
-
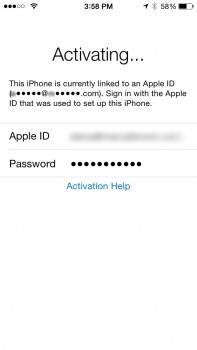
- Once you’ve entered in the correct Apple ID and password, your iPhone will begin activating. This should only take a few seconds and the next screen you should see is your iPhone’s normal home screen with all your App icons.
If you see any screen besides the “Activate iPhone” screen, follow whatever instructions are shown to proceed. If you see the “Choose a Wi-Fi Network” screen, make sure your current Wi-Fi network is selected and tap Next, or if for some reason you weren’t already connected to Wi-Fi, do so now and tap Next. If you have followed the process correctly, you should end up at the “Activate iPhone” screen. Note that if at any point you see a message that says “Could Not Activate iPhone,” do not panic. The message likely states that the activation server is temporarily unavailable. Just wait a few seconds and tap Try Again.
Once you are at the “Activate iPhone” screen, enter in your Apple ID and password (you did verify these already, right?) and tap Next. If you entered in the correct Apple ID and password, after a few seconds your iPhone should enter its normal home screen with all your App icons. The only difference you should notice is that instead of your normal wireless carrier showing in the upper left corner of your screen, you should see the name of the company of the SIM card you just inserted. If you don’t see it right away, just wait a few more seconds. Once you see the name of the other company, you are done. Your iPhone is unlocked and connected to another carrier’s network.
Note that you will not necessarily be able to make a phone call or get on the Internet through the carrier’s network at this time. That is fine because if you purchased a cheap pre-paid SIM card, you have not paid for a service plan. You do not need to make a phone call or get on the Internet to verify that your iPhone is unlocked. Just viewing the name of the other carrier in the upper left corner is enough for now.
At this point you can eject the new SIM card and put your original SIM card back in your iPhone. You will not need to go through any special process. Once your original SIM card is back in your iPhone, after several seconds you should notice that your original carrier shows up once again in the upper left corner of your iPhone screen. That’s it. You should be able to use your iPhone again normally. If you borrowed the SIM card of a friend, they should be able to put their SIM card back in their phone and return to normal as well.
A Movie is Worth a Million Words
All that being said, it is often easier to see this process in action than it is to read about it. So I created a video showing the steps of activating an unlocked iPhone. Enjoy!
My iPhone is Unlocked. Now What?
Now that you’ve activated your iPhone’s unlocked status, the next time you insert a SIM of another wireless carrier into your iPhone, you will not need to go through any special process. Usually you will simply wait several seconds for the name of the new wireless carrier to show up in the upper left corner of your iPhone screen. In some cases, if the “Searching …” indicator does not go away after a minute, you may need to power off your iPhone and turn it back on in order for it to recognize the new SIM card. Regardless, once your iPhone is unlocked and has gone through the activation process one time, it will stay unlocked forever and should never need to go through that process again. You will be free to use the SIM card of any company you please, which can be great when you are traveling in foreign countries.
Note that if you purchase a new iPhone, unless you are specifically purchasing an unlocked model, you will need to have that particular phone unlocked if you wish to use foreign SIM cards while traveling. Unlocking is specific to a particular phone, not to you or your account.
For more information on saving money while traveling with your iPhone, please check out my book, The Cheapskate’s Guide to Traveling With Your iPhone. Also, feel free to comment below with any questions you may have.